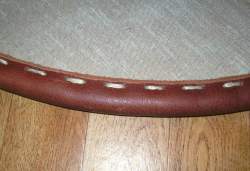
Leather edge
Preparation of the shield
The edge of the shield should not be rounded for a leather edge, otherwise the rope will always slip back and forth. It should only be deburred, i.e. slightly rounded at the edges so that there are no sharp edges.
Here is a schematic drawing of the edge.
 First, drill holes in the border at regular intervals.
I did this at intervals of about 2 cm.
The holes should have such a wide diameter that it is quite possible to pull all the threads through without too much friction.
In my case I had to place the thread 2 times, because I chose a single seam each time. This corresponded to a diameter for the hole of 2,5 mm for my thread.
Sewing the rope
 The rope should have a diameter between 8-12 mm and a length corresponding to the diameter of the shield * Pi plus approx. 20 cm.
A strong thread is needed for sewing. I use parcel tape or artificial string.
To sew the rope in place, I used a needle with a very strong thread to form an eyelet, which I then used to pull the much thicker thread through. This made the work much easier.
The sewing should be as tight as possible, so that the rope is already firmly attached to the edge of the shield and can only be moved a little forwards or backwards.
I always recommend tying a knot after a few sewing stitches.
 The ends of the rope can either be spliced or simply butted together. When splicing, the rope is partially unravelled at the ends and corded to the other end so that the respective parts of the rope do not end in the same place.
Sewing the leather
 }}
For this, the holes of the shield are transferred into the leather. Small deviations are not a problem. So everyone can use the edge of the shield as a guide without having to think about the resulting stretching in the edge area (in the case of leather in the middle of the strip), which is caused by the widening of the radius of the shield.
By the way, the leather should be relatively soft and relatively thick. I used 4 mm cowhide.
When the holes are finished, you can go back to sewing. Care should be taken not to pierce the thread from the previous sewing, as this will create additional wear on the thread and increase the likelihood of knotting.

