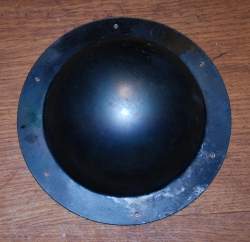
Shield boss blackening
 To blacken a hump, in addition to the hump, oil and a heat source (for example, a burner or a forge) and tongs are needed.
Always remember to drill the hump before blackening.
I prefer blackening with a burner, as it is easier to do at home and less dangerous. For larger items (such as helmets) it is also much easier to control. For smaller items (such as fins for a lamellar), I prefer to do the mass-produced clearance in bundles of 20 in the forge.
Blackening with the burner
To blacken the hump, first coat the hump with the oil so that the surface is completely covered.
I prefer linseed oil. This covers quite well and resins almost completely, should it happen that the blackening process is not completed. However, it is also possible to use other oils or beeswax. Beeswax is particularly suitable for subsequent coating.
Then the hump is slowly heated with the burner. Always proceed from thick or angular areas to thin, smooth areas. The colour change during heating:
- The oil becomes yellowish and more liquid. Caution: Heated oil may drip off. approx. 100-200°C
- The oil becomes dark and brownish approx. 200-250°C
- The metal becomes reddish approx. 260°C
- The metal turns purple approx. 270°C
- The metal becomes violet approx. 280°C
- The metal becomes dark blue-black approx. 290°C - this is the temperature we want to reach when blackening and no higher.
- The metal becomes blue-grey approx. 340°C - blackening fails from here on.
- The metal becomes grey approx. 360°C
If the heat is too high, it is sometimes possible to cool the area with oil and save the blackening process. In most cases, however, the process has to be started all over again.
The procedure from thick to thin serves to proceed from the spot that needs a lot of energy to the one that needs little, so that when heating the thick spot, the thinner ones are not overheated.
When heating with the burner, always pay attention to where the flame is pointing. This can be called the direction of heat. It has a decisive effect on how the flame heats the workpiece and whether the flowers on the balcony are burnt off in the process. 
After the hump has been brought to the necessary temperature everywhere and thus blackened - it makes sense to proceed in sections in one go - the hump should again be completely heated with the flame. the hump should be completely coated with oil again. This once again ensures that all areas are covered and thus protected from corrosion.
Then the hump must cool down.
After cooling, the remaining oil can be removed with a cloth.
Blackening in the forge
First, a container with oil is provided in which the hump can be completely immersed. Then the hump is brought to a uniform, dark red annealing colour in the fire. This is about 700°C, more is not necessary.
As soon as this has been done, the hump is immersed in the oil container while constantly moving. Caution: The oil can ignite during immersion! The movement is necessary so that any gas bubbles that may have formed are wiped off and regular blackening takes place.
This method is more suitable for small parts, such as the parts of a lammelar. Bundles of small parts can then also be heated and dipped.